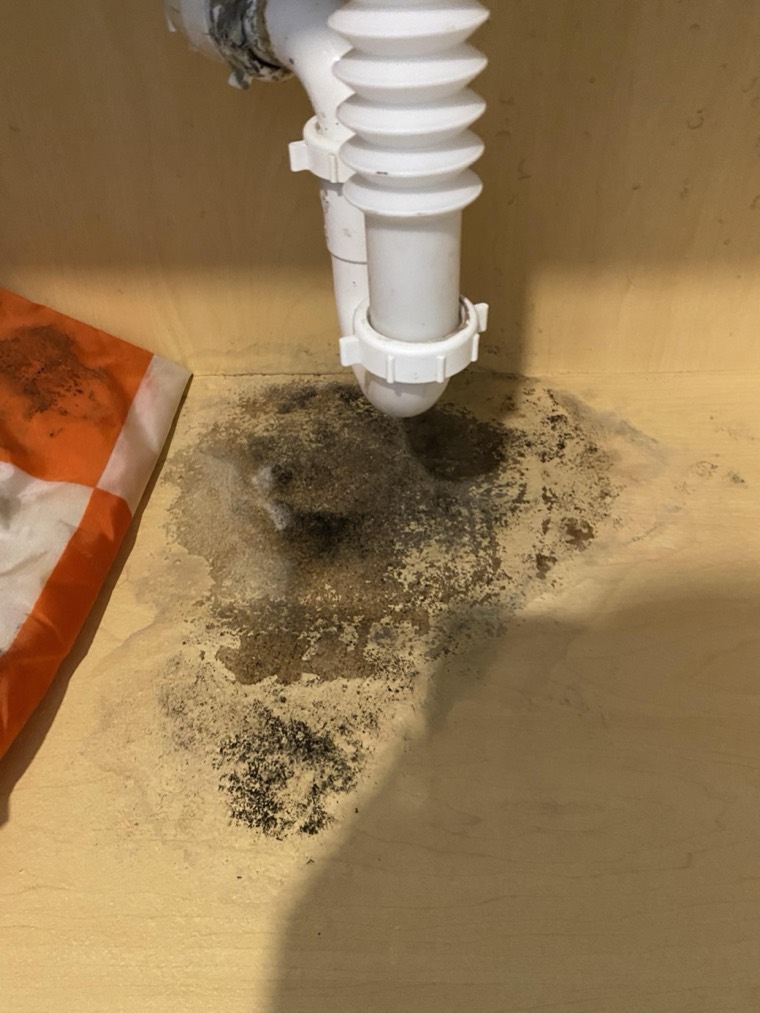
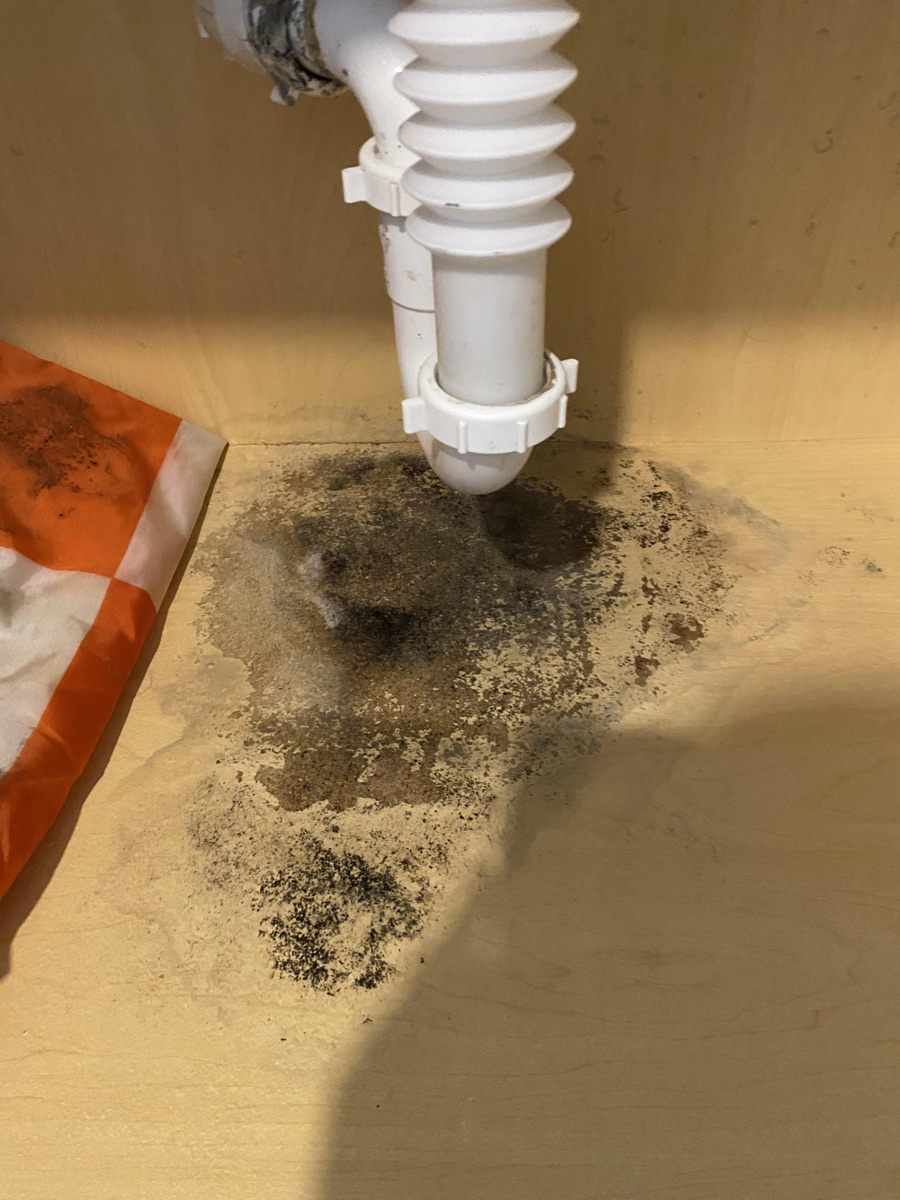
This looks like mold
A cabinet floor beneath a sink drain shows a dark, irregular, clustered stain spreading from the pipe joint. Call a pro to check the area beneath drain trap and moisture source before cleanup.
Why medium confidence?
Dark clustered irregular growth directly under an active drain pipe shows classic moisture-driven mold distribution on a wood cabinet floor.
Confidence describes how clearly the visible finding shows in this photo. It is not a measure of severity, and it says nothing about hidden conditions.

What the AI Saw
Fix any leak or dampness. Do not touch the spot. Have the surface and size checked in person before cleanup.
A cabinet floor beneath a sink drain shows a dark, irregular, clustered stain spreading from the pipe joint.
This photo shows a cabinet floor with a dark, irregular patch spreading from beneath a drain pipe joint. The clustered, powdery to blotchy texture and its direct link to a plumbing connection point are consistent with mold-like growth rather than simple dust. The verdict remains a visual screen only, since a photo cannot confirm active leakage, moisture content, or lab-confirmed mold identity. The pattern's concentration near the pipe fitting is the strongest visible clue pointing away from ordinary dirt accumulation.
- Whether the pipe joint is currently leaking or just condensating
- The true moisture level of the wood beneath the surface deposit
- Whether the growth extends further back into the cabinet or wall
- Material composition under the visible layer of debris

Your next move, starting now
10 steps for the area in your photo. Start with the checks below, then follow the repair or cleanup path that fits what you find.
From your photo
A cabinet floor beneath a sink drain shows a dark, irregular, clustered stain spreading from the pipe joint.
If You Decide to Do It Yourself
The visible pattern looks like mold. Call a pro to check the affected material and size before cleanup. The full reference below explains the work, supplies and stop signs for a small, sound hard surface. It does not authorize cutting out grout, removing sealant or working on damaged or porous material.
A scanner grade or a checked box does not establish the material or approve the work. If the material, moisture source or affected size is still uncertain, leave it alone and call a pro. Do not scrape, cut or remove material to find out what it is.
- Dampness. Look for visible dampness around the mark. Have uncertain material checked in person. A damp surface or soft material needs a moisture check.
- Color and texture. Orange brown can point to rust, white chalky deposits to minerals, and a flat brown tide line to water staining. Dark speckled, fuzzy or spreading marks can point toward growth. Appearance alone does not confirm the material.
- Check the lighting. A shadow can move when the light moves. A surface mark stays in place. Do not scrape or rub an uncertain spot to identify it.
- Record changes. Keep the original photo and note any new marks, dampness or odor. Do not wipe an uncertain spot to test what it is, and do not wait for it to grow before arranging the check recommended above.
- Smell. Tell the pro about any musty odor, including where you notice it. Odor can help guide the check; it does not establish hidden mold.
Some conditions are still unknown or not met. Do not use these instructions for this spot. Call a pro to check the material and scope.
Use the guidance for the material identified in person. The photo alone does not establish that the surface is suitable for cleanup. If it is damaged, porous or needs removal, call a pro.
If the affected surface is glazed tile
This reference applies to sound glazed tile after the material and scope are checked in person. Grout needs its own check. Do not cut out grout or remove material to find out what the marks are.
If the affected surface is caulk or a door track
Caulk is a sealant, not a hard surface; this covers wiping the exposed surface only. Use detergent cleaning and the manufacturer's care instructions when the surface has been checked and is suitable. Persistent marks, recurrence or a concealed problem need an in person check before removing caulk or lifting a track.
If the affected surface is another hard surface
Use this reference only for sound, identified hard material such as glass, metal or plastic. Sound paint in a photo does not establish that drywall or plaster behind it is unaffected. Damaged or porous material needs a pro.
Avoid touching the contaminated sides of clothing, gloves and other used gear. Remove them carefully without shaking them. Remove respiratory protection by its straps after the other gear is handled. Follow the maker's instructions for anything reusable.
For an eligible sound hard surface, detergent and water are the basic cleanup reference. A disinfectant is not a substitute for removing material or fixing moisture. Do not mix cleaning products. If a product is used, follow its surface restrictions, protective-equipment instructions and label contact time.
Avoid sanding, dry brushing and fine spray mist that can disperse material. Use the wet cleaning method appropriate for the checked surface without soaking it. Stop if the surface starts to break down.
Start only after the material and scope meet the conditions above. Keep other people and pets away, clear the work area and plan how to bag waste without carrying loose debris through the home. Do not aim a fan across the affected surface. Do not disturb vents, ducts or electrical equipment. If the job needs containment or air-pressure control that you cannot assess or set up properly, call a pro.
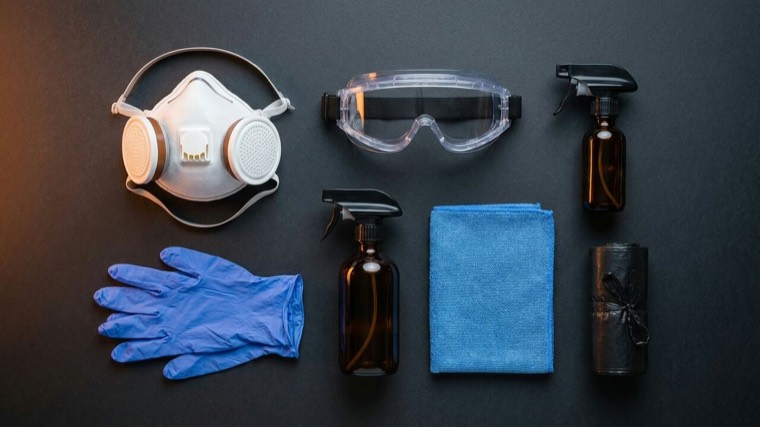
Use the gloves, eye protection and respiratory protection appropriate for the work and any product label. The gear list includes options to compare. Follow the respirator maker's fit and use instructions; a poor fit reduces protection. Wear suitable clothing and follow its instructions for removal and disposal. If you cannot use the required protection, use a pro.
Use detergent and water to remove the visible material from the checked hard surface, then dry it thoroughly. Use clean cloths and avoid spreading residue to nearby surfaces. Do not soak porous material. If the surface breaks down or marks remain and you cannot tell what they are, stop and call a pro. Follow any cleaner's own label, including surface compatibility and contact time. Use a true HEPA vacuum only where appropriate for the material and equipment instructions; do not substitute a household vacuum or ordinary shop vacuum.
Bag used disposable materials without shaking them or spreading debris. Follow local disposal requirements and the product or equipment instructions. Keep the dirty side of reusable equipment away from clean surfaces and follow its cleaning instructions. Remove used clothing and gloves carefully, then remove respiratory protection by the straps. Wash hands and exposed skin after handling used gear.
Check that visible material has been removed and the surface is dry. Photograph the area and compare it again after a day and after a week. These checks help you notice changes; they do not certify clearance or rule out hidden growth. If marks return, dampness remains, material deteriorates or odor continues, stop further cleanup and call a pro. Keep humidity under 60 percent, ideally 30 to 50 percent. Testing is not an automatic requirement; section 06 explains the options and their limits.
- Paint bubbles, the surface crumbles or material comes loose: stop. The work may involve damaged porous material.
- The odor becomes stronger: stop and call a pro to investigate. Odor does not by itself identify the substance or prove hidden growth.
- Marks remain and you cannot tell whether they are residue or growth: stop. Do not keep scrubbing, cut out grout or remove material to test it.
- You develop breathing difficulty or irritation: leave the work area and seek appropriate medical help. Do not continue the job.
- Marks or dampness return after cleanup: stop repeated cleaning and have the moisture source and remaining material checked.
- There are concerns about HVAC equipment or ducts: leave the system work to an appropriate professional.
Gear and prices for the cleanup reference below. Keep this list for planning. Have the surface checked before choosing supplies. The list does not approve cleanup of the spot in your photo.
Gear and optional tests, with links to compare features and prices. Not every item is needed for every job. Prices are reference ranges; check the current listing before buying.
Cleanup references: EPA mold cleanup in your home and EPA's guide to mold and moisture. These resources do not establish that home cleanup is appropriate for this photo.
Some links in this section are affiliate links. If you buy through one, Mold Scanner earns a small commission at no extra cost to you. That never changes what we list.
If You Hire Someone
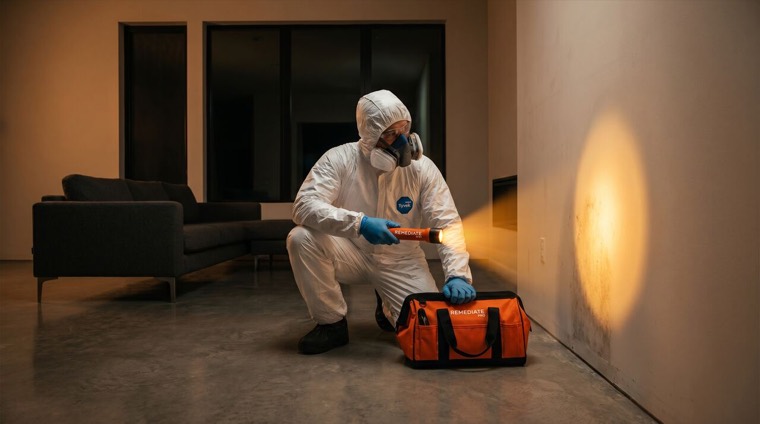
If the self-check in section 03 fails on any point, or you would rather have a professional look, this is how to choose someone.
Verify
- Verify insurance and any license your state requires. Texas, Florida, New York, Louisiana and Washington, DC license mold assessors or remediators. Most states, including California, have no mold license, so not having one there means nothing.
- Where there is no state license, look for training such as ACAC, IICRC or NORMI. Those are training credentials, not licenses, and a good assessor may hold a different one.
- Ask whether the work follows the ANSI/IICRC S520 remediation standard.
- Use an independent assessor when possible, separate from the cleanup company.
Ask
- What moisture readings and measurements support the scope?
- Which materials are affected, and how was that confirmed?
- What is included in the written scope and final verification?
The inspector verifies what was done. If they bill for the work AND grade the work, they grade themselves. This separation is widely recommended, and states such as Texas, Florida and New York license assessment and remediation separately; requirements vary by state. Hire two separate companies, even if it costs more.
- They want to fog with chemicals (ozone, anti-microbial fog). EPA does not recommend bleach as routine practice, and fogging is not a substitute for physical removal.
- They cannot show you proof of insurance, any training, or a state license where your state issues one.
- They refuse a third-party post-remediation verification (PRV).
- They demand full payment up front, or a deposit larger than your state allows. Several states cap contractor deposits; check yours before signing.
- They are also offering to "test" the home. (Conflict of interest.)
Sources: ANSI/IICRC S520, and EPA guidance on hiring a mold contractor.
Most states have no mold license, including California, so a missing license there means nothing. Where a state issues one, check it on the agency site, not on the contractor's flyer.

What a Pro Might Quote
A photo cannot price a job. These are illustrative US ranges by scope to help you compare quotes. The example tier is chosen by grade, not measured from your photo.
- Containment around the spot, not the room
- HEPA scrubber for the job
- Patch replaced, then verified
- One to two days on site
In a real mold quote
Pushes it up
- Ask for separate prices for assessment, source repair, affected-material work and restoration.
- Ask what is included, what is excluded, and what would change the price.
- Compare two written quotes against the same scope, not two different scopes.
- Do not accept a mold remediation quote for a rust stain, a mineral deposit or a flat water stain. Those are repair jobs.
Illustrative US ranges Mold Scanner uses for orientation, not verified quotes and not a price for this photo. A reliable price needs an in-person scope. Get two written scopes against the same plan before signing anything.

Test your home, test your body
Home sampling and medical tests answer different questions. This photo does not establish a need for either. Here is what these services offer, their limits, and what to ask before paying.
EPA guidance is that sampling is usually unnecessary when mold is visible: the answer is to remove it and fix the water. If you want a surface sample to check a cleanup, have a professional choose the method and read the result. A test never replaces fixing the water.
EPA on testing: Mold testing or sampling, and Should I test my home using ERMI?
These are ordered or read by a clinician. A wall photo cannot establish the cause of anyone's symptoms or select a medical test, and this report does not diagnose anything or recommend any test below. If someone in the home feels worse at home than away, take this list to a licensed clinician and ask how a result would change care. The services below are listed for information, not as a recommended testing plan.
Sources: EPA guidance on mold sampling and on ERMI; the CDC 2015 report on urine mycotoxin testing (MMWR 64(06)); the labs' own product pages. Prices below are reference listings, not a quote from every linked seller. Links identify services; they are not endorsements of their clinical usefulness. Only the Amazon links pay us a commission; the labs do not.
Price sources and what is included
US reference prices checked September 7, 2026. Taxes, shipping and clinician fees may be extra. Amazon prices can differ from the reference sellers below.
- Mold Armor FG500: Home Depot lists $9.98 for the kit. Optional lab analysis costs extra.
- Healthful Home: The maker lists $35.98 for a single 5 minute test.
- GOT MOLD?: The maker lists $199, $249 and $299 for its one, two and three room kits.
- ERMI: EnviroBiomics lists $240 to $435, depending on the selected service.
- The Dust Test: $299 for the dust kit; $342 for the separate Mosaic MycoTOX Profile. The MycoTOX amount is a partner listing on The Dust Test site; Mosaic or another clinician may charge differently. These are separate purchases.
- RealTime Labs: $399 for its Mycotoxin Panel.
- Vibrant Total Tox Burden: Well Route lists $799. This is one provider price, not a universal lab price. A separate consultation may cost extra.
- VCS: One limited result is free; detailed results and another test request a $15 contribution.
- The symptom questionnaire is free. Blood tests have no fixed package price; the lab prices the clinician's actual order.
Some links in this section are affiliate links. If you buy through one, Mold Scanner earns a small commission at no extra cost to you. That never changes what we list.
What to Run, and Where
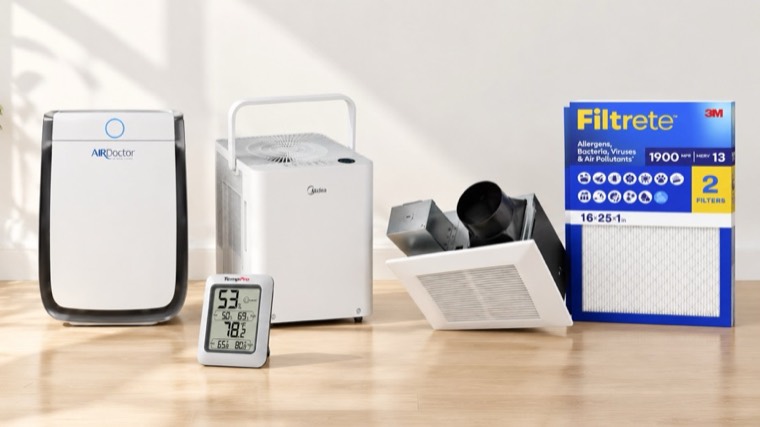
Run these in the bathroom first. They lower humidity and airborne particles. They do not fix a leak and they do not remove existing growth, so they sit beside the fix, not in place of it.

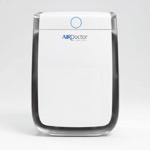
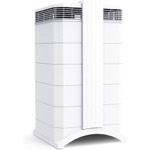
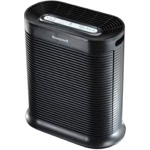
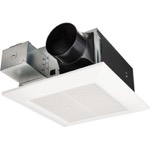
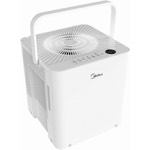
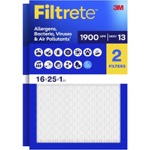
Humidity targets follow EPA guidance. Coverage, filtration and price figures are manufacturer or listing claims at the time of writing; check the current listing and your room size before buying.
Some links in this section are affiliate links. If you buy through one, Mold Scanner earns a small commission at no extra cost to you. That never changes what we list.
Why it grew here, and how to keep it from coming back
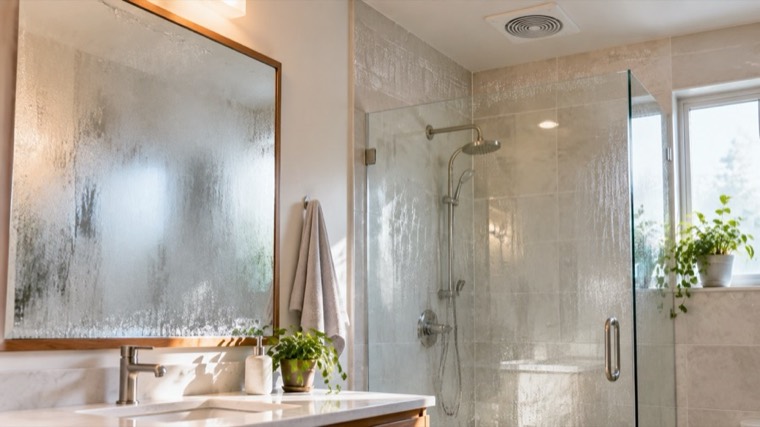
Bathrooms can develop mold when moisture stays on surfaces. Shower steam, leaks and condensation are common sources. The spot in your photo is a place to check for that.
- Shower steam with the exhaust fan off, or a fan that vents into the attic instead of outside.
- A slow drip at the tub spout, the supply line under the sink, or the toilet supply valve.
- Grout and caulk that stay wet between showers because the room never dries out.
- A ceiling corner that is colder than the rest of the room, so steam condenses there first.
EPA mold guidanceFix the water problem, then clean or remove the material
Open
The federal guidance for homes is short and practical. Control the moisture and the mold problem controls itself. US Environmental Protection Agency, published homeowner guidance.
- Fix plumbing leaks and other water problems as soon as possible, then dry everything within 24 to 48 hours.
- Scrub mold off hard surfaces with detergent and water, and dry the surface completely.
- Throw out absorbent or porous materials that have been soaked, such as ceiling tiles and carpet.
- Do not paint or caulk over a surface until it is cleaned and dried. Paint applied over mold peels.
- Keep indoor humidity down, generally below 60 percent, using ventilation or a dehumidifier.
- Vent bathrooms, dryers and other moisture sources to the outside.
Read more at epa.gov/mold
Finding the moisture sourceWork backwards from the wet spot to the water that made it
Open
Growth marks where water ended up, not where it came from. The source is often above it or behind it. Building science, standard inspection practice.
- Check directly above the area. Water travels down and sideways.
- Check plumbing walls: under sinks, behind toilets, at tub and shower surrounds, at supply line connections.
- Check the air conditioning coil, drain pan and condensate line, which stay wet whenever the system runs.
- Check where warm indoor air meets cold surfaces: exterior wall corners, window sills, uninsulated ducts.
- Check outside for grading, gutters and downspouts that push water toward the foundation.
- Write down when it appears. Only after rain points at the envelope, year round points at plumbing or humidity.
Read more at epa.gov/mold
IICRC S520 remediation standardFix the moisture source first
Open
Stop the water, contain the area, remove what cannot be cleaned, and have someone independent verify the work. ANSI/IICRC S520, the industry consensus cleanup standard.
- Fix the water source first. No cleanup until the water is stopped.
- Seal off the room so it pulls air outward: plastic walls, a zipper door, air vented out through a HEPA scrubber.
- Remove affected drywall, insulation and carpet past the visible edge, as the scope of work defines.
- HEPA vacuum and damp wipe every surface, then HEPA vacuum again.
- Have a qualified HVAC pro check the system if contamination is suspected. Clean components or replace filters only as the findings and manufacturer instructions require.
- Have a different, independent company verify the work afterward.
Read more at iicrc.org/standards/
Keeping it from coming backControl humidity and dry anything wet within 48 hours
Open
Prevention is entirely a moisture problem. It is the part most people skip after a cleanup. EPA and CDC published prevention guidance.
- Keep indoor humidity generally below 60 percent. A hygrometer tells you where you actually stand.
- Dry any wet or damp material within 24 to 48 hours. That window decides whether growth starts.
- Run exhaust fans during and after showers and cooking, and confirm they vent outdoors.
- Service the air conditioning system, including a clear condensate drain, and change filters on schedule.
- Keep gutters clear and grade soil to slope away from the foundation.
- Re-check the repaired area a few weeks later. A spot that returns usually points to dampness that was not resolved, so check for it again.
Read more at cdc.gov/mold/index.html
Rescan this spot 30 days after the fix. A later scan shows visible change, nothing more. If the spot returns, check for unresolved dampness, remaining affected material, or another cause, and call a pro if it keeps returning. Your scans keeps every read side by side. Questions about this report? Ask support.

Letters You Can Send
Six editable drafts, each with the photo attached and a numbered list of what you are asking for. Tap a draft to expand it, then copy it or open it in your mail client. Fill in the brackets, delete anything that is not true for you, and check your lease or policy for any notice rules. Send by email and keep the sent copy. Do not withhold rent or repair and deduct before checking your state's procedure, because done wrong, both can get a tenant evicted.
First message to your landlordReports the condition and asks for an inspection date
Open
Date: [date you send this]
To: [Landlord or property manager, name and address]
Re: Request for an inspection, bathroom, [unit address]

Dear [Name],

I am writing to report a visible condition in the bathroom and to ask for an inspection. I am attaching a photo of the bathroom. Photo date: [enter the date the photo was taken, if known]. A photo-screening report was generated on Sep 8, 2026 and describes a visible pattern that may be mold. The report's description of the photo: "A cabinet floor beneath a sink drain shows a dark, irregular, clustered stain spreading from the pipe joint."

The report gave the area grade C on its A to F scale. That grade is a screening result about how the visible finding looks and what to do next. It does not confirm mold, its cause, the extent behind the surface, or any hidden condition, and this message makes no claim about any of those.

[Optional: describe anything you have done to the area, or note that you have left it alone.]

I am requesting:

1. An inspection of the area, and of any water source above or behind it, by an independent mold assessor. Please let me know the earliest date you can arrange.
2. A written summary of what was found, including any moisture readings.
3. If work is needed, a written plan and timeline before it starts.
4. Confirmation of who will cover the cost of the inspection and any work.

Please confirm receipt and let me know the next step. [Optional: I would appreciate a reply by DATE.]

Sincerely,
[Your name]
[Unit or address]
[Phone] [Email]

Attached: the photo and the Mold Scanner report.
Follow-up if you get no replyAsks again, with a date you choose
Open
Date: [date you send this]
To: [Landlord or property manager]
Re: Follow-up, a suspected moisture problem, bathroom, [unit address]

Dear [Name],

On [date of first message] I sent a message about a visible condition in the bathroom, with a photo attached. [Choose one: I have not received a reply. / I received a reply but no inspection date.]

[Describe the current state of the area, for example: unchanged, larger, damp, or a smell.]

I am asking again for:

1. An inspection date. Please let me know the earliest you can arrange.
2. A written summary after the inspection, including any moisture readings.
3. A written plan and start date if any work is needed.

If it helps, I can make the unit available on [days and times]. I would rather resolve this directly. [Optional: I am also checking what my lease and local rules say about repairs and notice.]

Please confirm receipt and let me know the next step. [Optional: I would appreciate a reply by DATE.]

Sincerely,
[Your name]
[Unit or address]
[Phone] [Email]

Attached: the photo and the Mold Scanner report.
Message to your HOA or building managementAsks whether a shared element is involved
Open
Date: [date you send this]
To: [Board or building management]
Re: Visible condition that may involve a shared element, bathroom, [unit number]

Dear [Name],

I am attaching a photo of the bathroom. Photo date: [enter the date the photo was taken, if known]. A photo-screening report was generated on Sep 8, 2026 and describes a visible pattern that may be mold. The report's description of the photo: "A cabinet floor beneath a sink drain shows a dark, irregular, clustered stain spreading from the pipe joint."

The report gave the area grade C on its A to F scale. That grade is a screening result about how the visible finding looks and what to do next. It does not confirm mold, its cause, the extent behind the surface, or any hidden condition, and this message makes no claim about any of those.

The area is on or near [a shared wall / the ceiling below another unit / a plumbing riser / an exterior wall], so I do not know whether the source is inside my unit or a shared element. I am requesting:

1. Confirmation of whether this is something your team handles, or who I should contact.
2. An inspection of any adjoining shared space or shared water source, at the earliest date you can arrange.
3. A written note of what was found and whether the source is a shared element or inside my unit.
4. If it is a shared element, a written plan and timeline for the repair.

[Optional: describe anything you have done to the area, or note that you have left it alone.]

Please confirm receipt and let me know the next step. [Optional: I would appreciate a reply by DATE.]

Sincerely,
[Your name]
[Unit or address]
[Phone] [Email]

Attached: the photo and the Mold Scanner report.
Questions for your insurerAsks about the process before deciding on a claim
Open
Date: [date you send this]
To: [Carrier claims department]
Policy number: [policy number]
Insured: [your name]
Property: [property address]
Re: Questions about the reporting process, bathroom

To whom it may concern,

Before deciding whether to submit a claim, I am asking about your process. I am attaching a photo of the bathroom. Photo date: [enter the date the photo was taken, if known]. A photo-screening report was generated on Sep 8, 2026 and describes a visible pattern that may be mold. The report's description of the photo: "A cabinet floor beneath a sink drain shows a dark, irregular, clustered stain spreading from the pipe joint."

The report gave the area grade C on its A to F scale. That grade is a screening result about how the visible finding looks and what to do next. It does not confirm mold, its cause, the extent behind the surface, or any hidden condition, and this message makes no claim about any of those.

I am not making a statement about coverage, cause, dates of damage or actions taken. I am asking:

1. What your reporting process is and what documentation you would need to open a review.
2. Whether you require an inspection by an adjuster or a licensed contractor before any work, and whether I should avoid repairs until then.
3. Whether the policy carries a mold or fungi sublimit, and the amount.
4. Whether asking these questions opens a claim, and if so, how that is recorded.

[Optional: describe anything you have done to the area, or note that you have left it alone.]

Please confirm receipt and let me know the next step. [Optional: I would appreciate a reply by DATE.]

Sincerely,
[Your name]
[Unit or address]
[Phone] [Email]

Attached: the photo and the Mold Scanner report.
Scope request to a remediation companyAsks for a written scope before any price
Open
Date: [date you send this]
To: [Company name]
Re: Request for a written scope, bathroom, [address]

Hello,

I am requesting a written scope of work and quote for a suspected moisture and mold problem in the bathroom. I am attaching a photo of the bathroom. Photo date: [enter the date the photo was taken, if known]. A photo-screening report was generated on Sep 8, 2026 and describes a visible pattern that may be mold. The report's description of the photo: "A cabinet floor beneath a sink drain shows a dark, irregular, clustered stain spreading from the pipe joint."

The report gave the area grade C on its A to F scale. That grade is a screening result about how the visible finding looks and what to do next. It does not confirm mold, its cause, the extent behind the surface, or any hidden condition, and this message makes no claim about any of those.

Before any work, please provide in writing:

1. The credentials of the person assessing the area, including a state license number where the state issues one, and proof of liability insurance.
2. A moisture reading and the affected area, measured on site.
3. The remediation standard the plan follows, and how it handles containment, filtration, what comes out, how it is disposed of, and whether the HVAC system is affected. If it is, explain what work the findings support.
4. Who performs post-remediation verification, and whether that party is independent of your company.
5. Total price against that scope, and what would change it.

I will be comparing this against a second written scope for the same plan.

Thank you,
[Your name]
[Unit or address]
[Phone] [Email]

Attached: the photo and the Mold Scanner report.
Disclosure request to a seller, if you are buyingLeak history, prior tests, inspection contingency
Open
Date: [date you send this]
To: [Seller or listing agent]
Re: Request for disclosure, bathroom, [property address]

Hello,

During my visit on [date of visit] I photographed the bathroom. I am attaching a photo of the bathroom. Photo date: [enter the date the photo was taken, if known]. A photo-screening report was generated on Sep 8, 2026 and describes a visible pattern that may be mold. The report's description of the photo: "A cabinet floor beneath a sink drain shows a dark, irregular, clustered stain spreading from the pipe joint."

The report gave the area grade C on its A to F scale. That grade is a screening result about how the visible finding looks and what to do next. It does not confirm mold, its cause, the extent behind the surface, or any hidden condition, and this message makes no claim about any of those.

Before we go further, I am requesting in writing:

1. Any known history of leaks, flooding, roof or plumbing failures at the property, repaired or not.
2. Any prior mold inspection, test, or remediation, with the reports.
3. Any insurance claim related to water at the property.
4. Any repair to this area or the plumbing and roof above it, who did the work, and the invoices.
5. The completed seller disclosure form, if this state requires one.
6. Agreement to an independent inspection of this area, with moisture readings, as a contingency before closing.

Thank you,
[Your name]
[Unit or address]
[Phone] [Email]

Attached: the photo and the Mold Scanner report.
Not legal advice. Consult a licensed attorney for high-stakes correspondence (eviction, large insurance claim, OSHA filing).